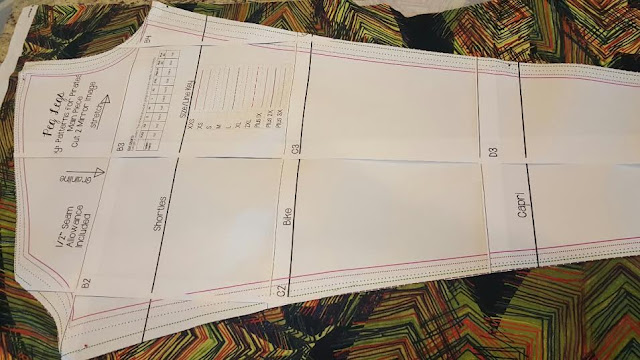
To kick things off I decided to start with McCall's pattern 7165 view A.
For my first go-around I decided to just complete the pattern as-is. No adjustments, just to see how it would end up fitting on me.
Of course, never having done shorts with a zipper fly I had to pause there to figure it out. My McCall's book for beginner sewers had completely different instructions than what came with the pattern. Then, when I looked online, people has additional different ways on how to do it. I was so confused. I decided to just do what the pattern called for.
After basting the front pieces together, with the wrong side of the shorts facing me, I placed the zipper facing up under the left side of the fly. The fly is folded along the fold line. Here I used the zipper foot to sew it to the fly. The top of the fly sticks up past the top of the shorts. Eventually the part sticking up will be hidden in the waistband.
That's really it. I didn't have much of a problem with making the mock fly zipper. I can get into more details on my next pair of shorts if requested.
Of course when I was making these I was not thinking of how hard some of the stuff I would be talking about would beto see in photos. These are the shorts. From a distance they are no too terrible. Honestly I was just happy they fit around my waist and my legs could go through them.
Look at all that extra fabric in the crotch area though! Talk about baggy crotch problems! The crotch of the shorts was about an inch or two lower than it should have been.
Because the fabric is black this photo isn't much help. But not too bad. Just a little looser than I would prefer.
I have to do something about all this fabric.... So what do I do? I had no clue at the time. Internet research to the rescue!!
These are the websites/blogs that helped me out the most:
Lladybird's blog post on trouser fitting.
This picture from afashionablestitch.com
The Colette patterns pants fitting cheatsheet
I can't recommend them highly enough and probably would just be wearing super baggy pants and shorts if it wasn't for their help.
So for my next pair of shorts I knew I needed to shorten the crotch and adjust the crotch shape. Since this was my first time doing it I had to eyeball and guess how much (because I still have no idea how to measure myself on this stuff...)
Can you see where I folded the pattern? I ended up taking out one inch of fabric. I did this to both the front and the back pieces. I did this where the pattern said lengthen/shorten here. This will shorten my crotch line. Then, where you see the blue ink is where I adjusted the crotch curve. I put an arrow to the thick line that I ended up using. I decided to not go as aggressive as I originally drew the line.
My second pair! Not perfect, but sooo much better in the front than the last pair! I don't look like I'm reserving room for anatomy parts I don't have... Plus the crotch doesn't hang down ridiculously.
Side view is also much better. It doesn't just go straight down in the back. I actually have a profile.
The back is a tad too tight. It is wearable, I don't think I'll bust the seams. But on my next pair I'll add just a touch to the back crotch line.
It's so nice to be able to make my own shorts!
I'm thinking my third pair will be near perfect. I just need to go to the store and get more fabric. I still don't feel comfortable cutting into my nice organic cotton. I'll do one more purchase of the cheap stuff for shorts #3 and will let you know how it goes!


